Block Puzzle strategy: make room for your next move
A high score starts with a board that still gives you choices. Before dropping a piece, look at the space it leaves—and at the other two pieces waiting below.
Play Block Puzzle →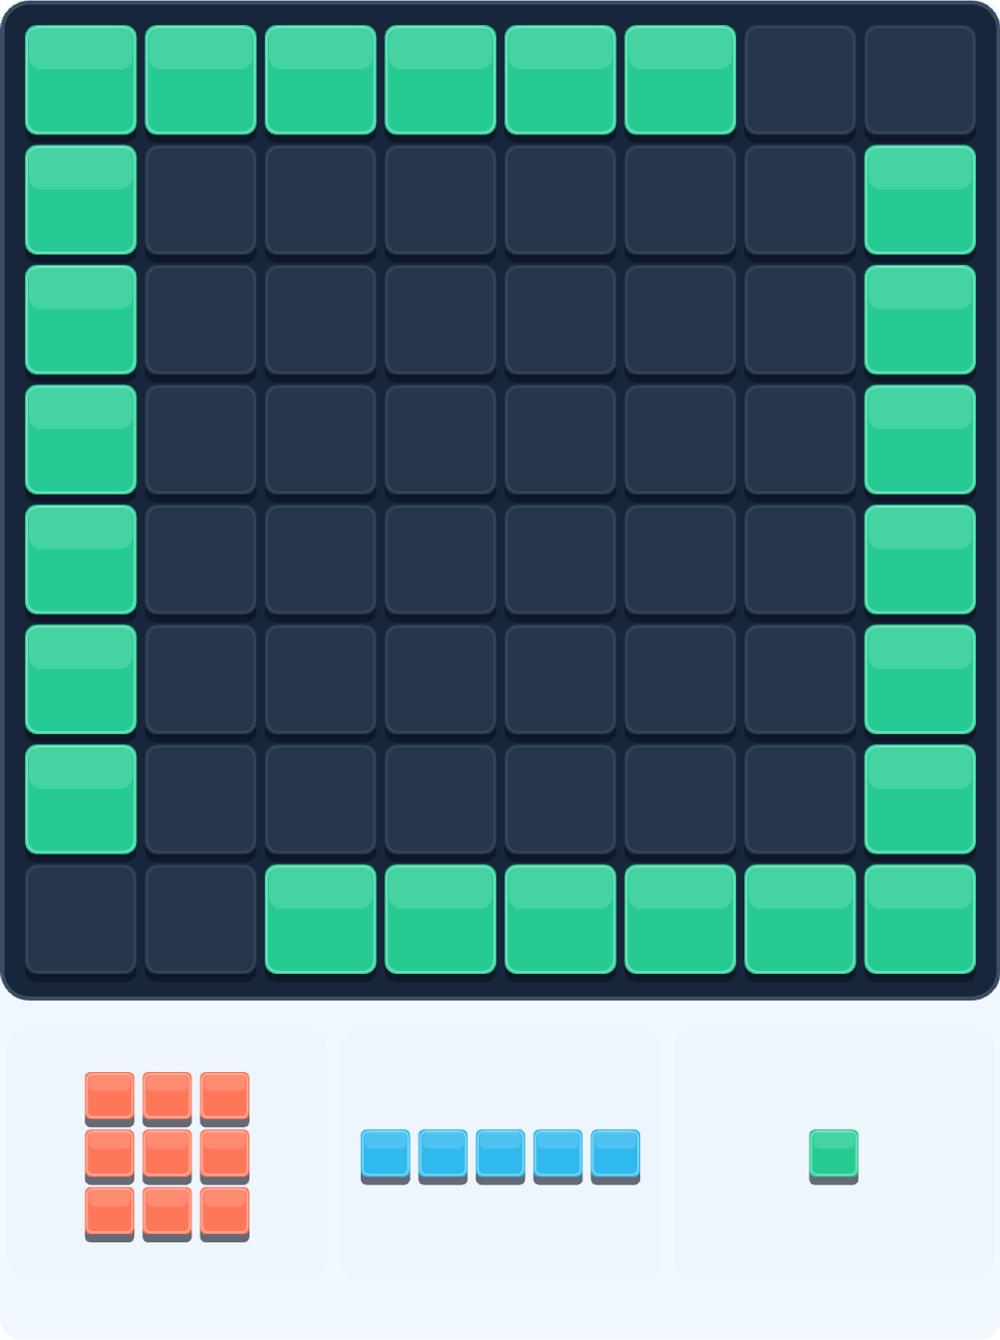
Start with the rules of this board
Drag fixed shapes onto the 8×8 board. Pieces cannot rotate, overlap or extend beyond an edge. Complete rows and columns clear together after each placement; a filled 3×3 region does not clear by itself. Colors do not affect clearing or scoring.
You can use the three tray pieces in any order. A fresh set arrives only after all three are used. The game ends when none of the remaining pieces fits, even if the board still has empty cells. There is no falling-block time pressure: take a moment to plan.
Protect spaces that fit whole shapes
A connected patch of empty cells is usually more useful than the same number of scattered holes. Keep room for a 3×3 square and check both horizontal and vertical five-cell lanes when possible. A lane shorter than five cells will not fit a five-cell bar.
Edges and corners are useful starting points because they can preserve a broad central area. They are not compulsory: a central placement that clears lines and opens space may be better. In this example, the center can accept a 3×3 square; the next picture shows why empty-cell count alone is misleading.
Avoid holes, but recognize how they can reopen
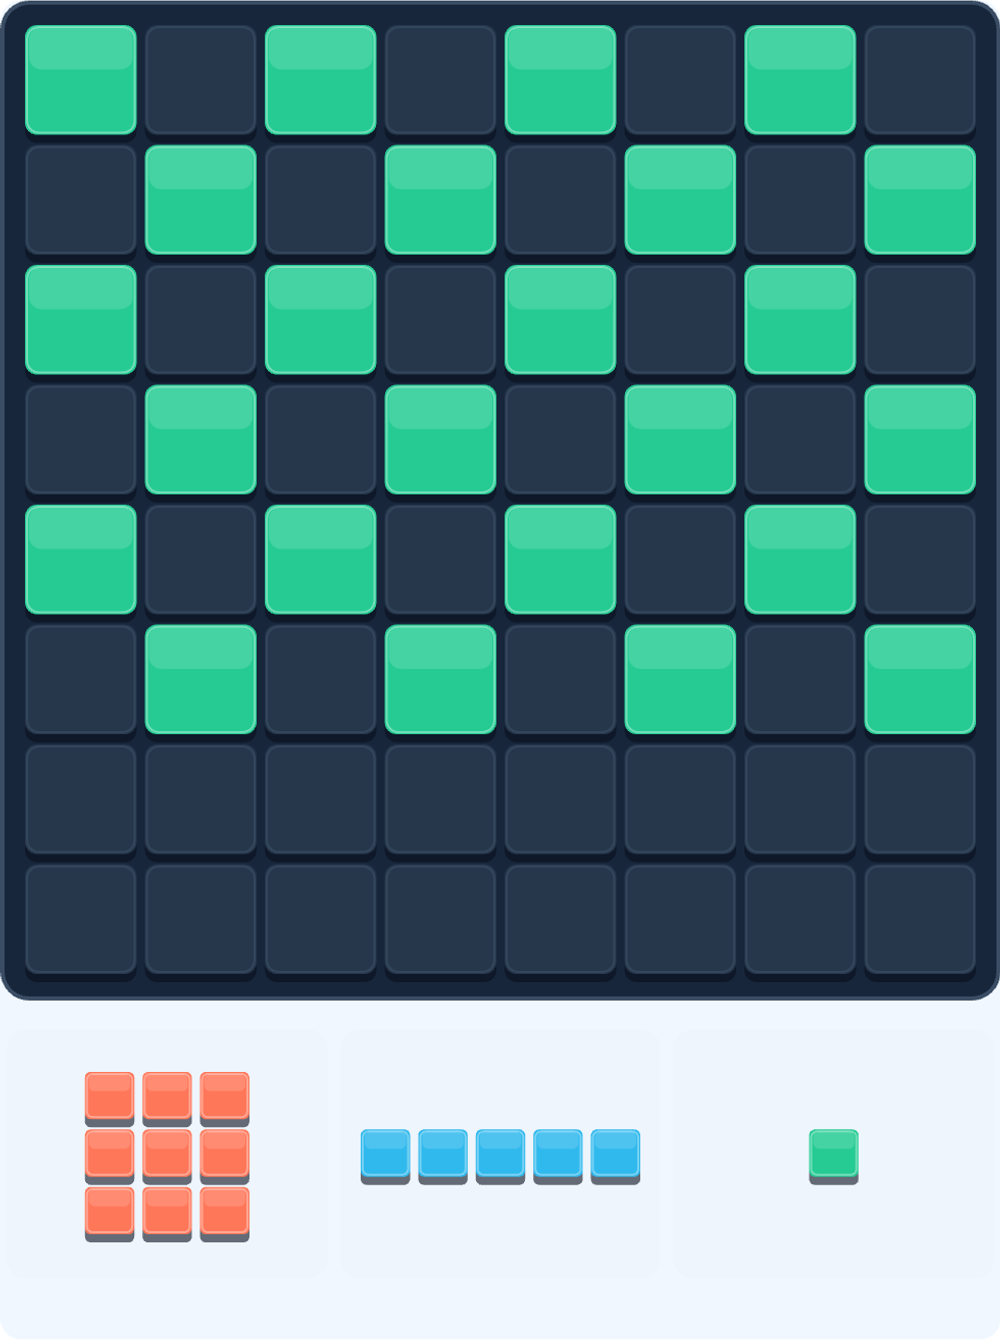
A single empty cell surrounded on all four sides cannot accept a connected multi-cell piece. It needs a single-cell piece, or a nearby row or column clear that opens the area. Do not count on the next tray supplying exactly the rescue piece you need.
The scattered board shown here also has 24 occupied cells, but no 3×3 opening. The small pieces can still move, so this is not game over. Use them to create a useful clear rather than dividing the remaining space further.
Plan the whole tray, not just the first piece
Compare possible orders before releasing the first piece. Start with the most restricted shape when it already fits and will not prevent the other two from being placed. Recheck the board after every clear: clearing changes where the next piece can go.
“Largest first” is not an absolute rule. A small piece that finishes a row may open the only space for a large square. Keep flexible pieces for specific jobs, such as closing a gap or freeing a lane. The green drag preview confirms a legal fit; inspect the rows and columns before releasing.
Score with clears that also open space
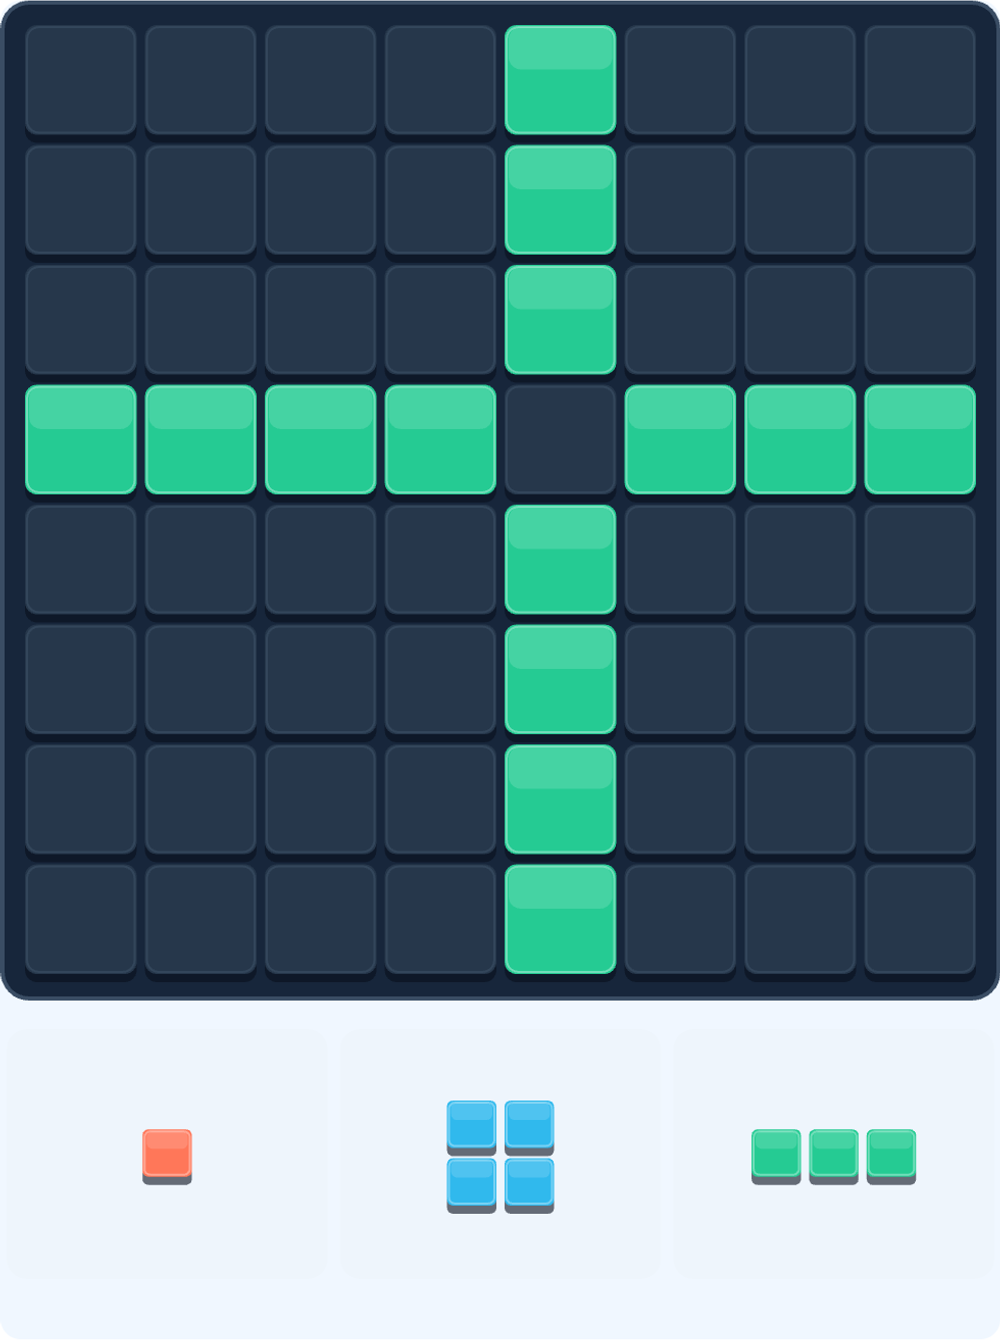
Each cell you place earns 1 point. Clearing one, two, three or four lines in the same move adds 10, 30, 60 or 100 points. Each additional line beyond four adds another 50. A row and a column completed together count as two lines, even though their intersection is removed only once.
Here a single cell completes one row and one column. From a combo of zero, that move earns 1 + 30 = 31 points and opens both directions. Multi-line clears are valuable, but do not block the last usable space while waiting for a bigger bonus.
A clear on the very next placement continues the combo: the second consecutive clear adds 10 extra points, the third adds 20, and so on. One placement without a clear resets it. This is an additive bonus, not a multiplier. There is no separate same-color or empty-board bonus.
Make the next tray easier to handle
The generator considers the board, recent shapes and move count; it does not switch difficulty at a fixed score such as 1,000 or 3,000. When a legal shape exists, the first two generated pieces are each chosen from shapes that fit the board at that moment. That does not guarantee both will still fit after your first placement, or that all three can be used.
Before every drop, ask three questions: can the remaining tray pieces still fit, which row or column am I preparing, and will I retain a useful open region? Prefer a modest clear that keeps you playing over an ambitious setup with no safe follow-up.