Gem Art Sort strategy: open the right color without wasting tray space
Back to the game →To solve Gem Art Sort, open access to the color the artwork currently needs, then choose its glowing destination. Use the holding tray to remove a blocker only when you can explain what becomes playable next. The tray counts individual gems, so one group can fill it.
This guide covers OnlinePuzzle’s 12 original artworks. There is no time limit; planning matters more than selecting quickly.
Understand what selection does—and does not do
- A group contains matching gems connected horizontally or vertically. Diagonal contact does not join a group. Start with groups accessible from the outside; enclosed gems need an open path.
- Selecting a group does not move it. You must choose a matching glowing artwork space or send the whole group to the tray.
- Placement fills the chosen artwork branch, not every disconnected area of that color. Excess gems enter the tray if capacity allows.
- Stored gems remain in the tray until you select their color and choose an available destination. They do not complete the picture automatically.
Worked example: opening Heart Charm
Level 1 begins with a 7-column, 6-row gem board, a 34-gem picture and an empty four-gem tray. The gold tip of the heart is available, but its source gem is enclosed. Count source-board rows from the top and columns from the left.
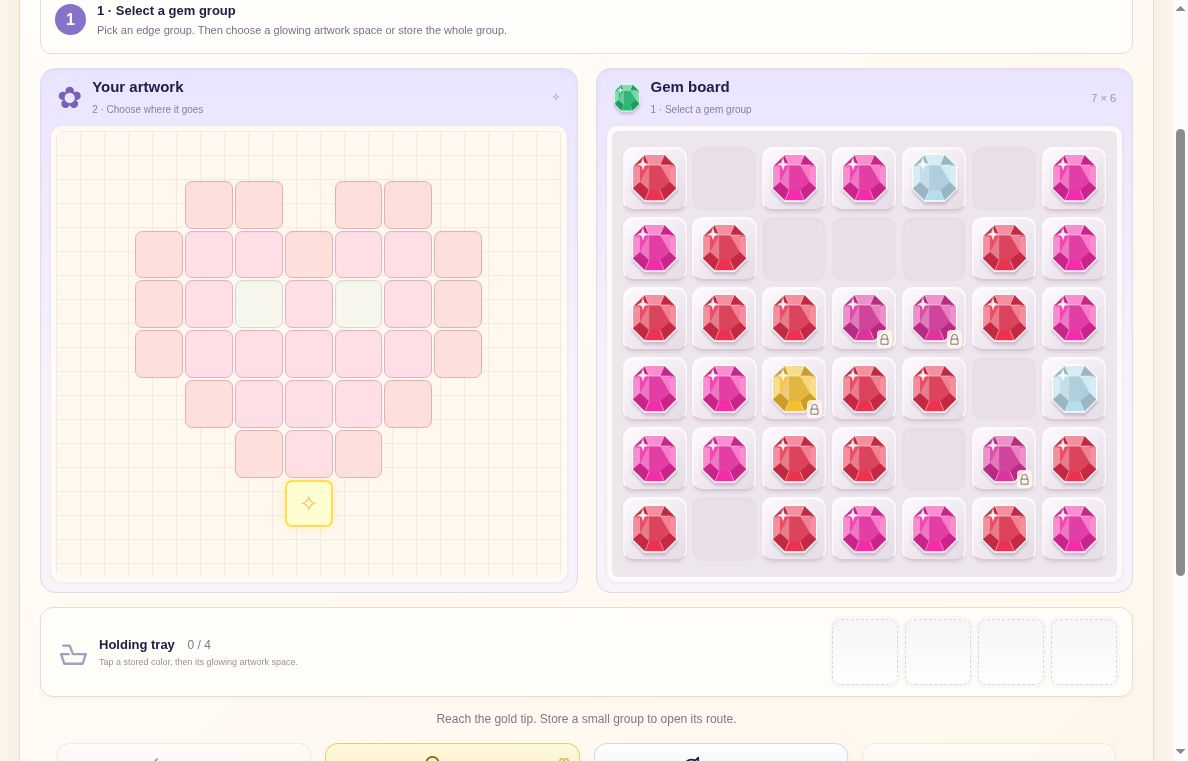
- Select the Ruby at row 2, column 2. The selected group contains four gems: that cell and row 3, columns 1, 2 and 3. Selection alone costs no move.
- Send the group to the tray. The counter becomes 4/4 and the move counter becomes 1. Removing those gems opens access to Gold at row 4, column 3.
- Select that Gold and choose the glowing gold tip in the artwork. This places the first picture gem: 1/34 filled after move 2.
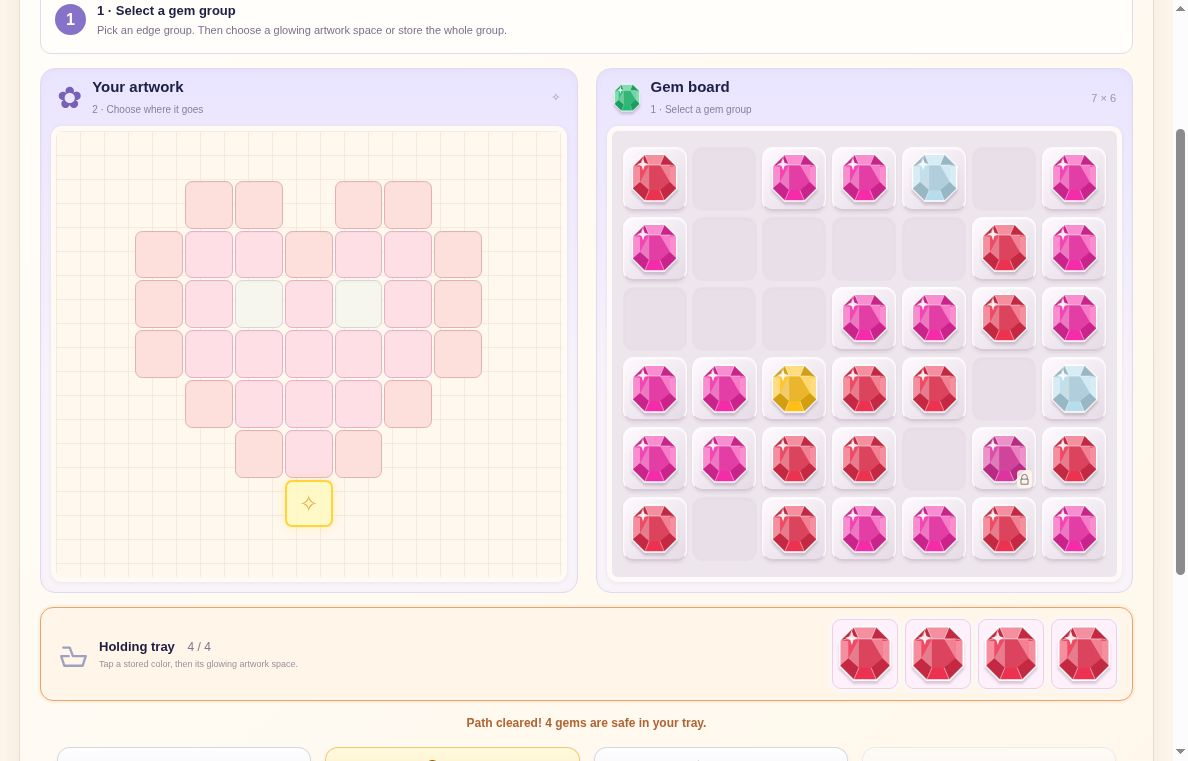
This opening explains an important exception to “keep the tray empty”: using all four spaces can be purposeful. Here, it opens a directly usable gold gem. This demonstrates the opening, not a complete solution.
Treat tray space as a route budget
Before storing a group, count its gems, check the remaining capacity and identify the next playable color. “It fits” answers only the capacity question. Also ask whether the move reveals a useful gem and whether that gem has a destination. Otherwise, you can fill storage without changing what the artwork accepts.
Keeping some capacity available is a useful default, not an absolute rule. The Heart Charm opening deliberately uses every slot. The better rule is to know the next step before committing storage. When a branch opens for a stored color, review that option instead of automatically taking another group from the board.
Choose a branch for what it opens
When more than one destination is available, compare the spaces that each placement will expose. Favor a choice that connects the colors you can reach to the colors the picture will accept next. Matching the largest group is not automatically best if most of it would become excess in a nearly full tray.
Read the selected group and destination together. A useful mental check is: source access, branch demand, leftovers, next color. A legal placement still needs a follow-up plan.
Avoid these common dead ends
- Counting groups instead of gems: four connected Rubies occupy four tray spaces, not one.
- Expecting diagonal access: side-to-side connections define a group; a touching corner is not enough.
- Expecting every matching region to fill: select the particular glowing branch you want.
- Waiting for stored gems to move: choose their color and their destination yourself.
- Continuing after a doubtful storage move: Undo restores the whole move so you can compare the earlier position.
The displayed move target is separate from simply finishing. Stars recognize completion, using no hints, and meeting that target. On a first attempt, learn why the route works; you can then revisit decisions that used avoidable storage.
Gem Art Sort FAQ
What does 4/4 in the tray mean?
All four gem spaces are occupied. Capacity counts individual gems, not the number of groups or colors.
Why can I not select an enclosed gem?
It needs access from outside the source board. Remove accessible groups to open a path; diagonal group connections do not count.
Will stored gems place themselves?
No. Select a stored color, then choose its matching glowing artwork destination.
Does a legal move guarantee the puzzle remains solvable?
No. The game blocks tray overflow, but an allowed move can still leave no useful continuation. Undo lets you reconsider it.
Does the move target end my attempt?
No. It is a star objective, not a countdown. You can aim to finish first and improve your route later.
Practice this opening in Gem Art Sort. Before each transfer, name the color and destination you expect to use next.